Serial Communications
Veronte Autopilot 1x can manage input and output serial ports (for more information on this, see the I/O Setup - Input/Output section of the 1x PDI Builder user manual).
A simply way to create serial frames (data in length wires) is by using the simulink UDP block. Therefore, the data entering Veronte Autopilot 1x should be sent via UDP (if this approach is adopted):
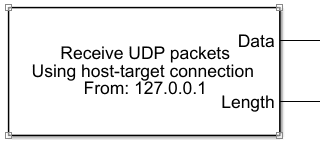
UDP Block
The ports included in Autopilot 1x and represented in the S-Function are as follows:
USB: USB port
SCI-A: 4G connection
SCI-B: Radio
SCI-C: Serial Port 485
SCI-D: Serial Port 232
Example: Sending a RS-232 message
In the following example, a constant value is sent as a RS-232 message.
First, the message is created as a bit array with Byte Pack block.
Next, it is neccesary to receive this information as UDP packets on the corresponding port (in this case 16003). Width block is used to compute data length. This UDP packet is then sent to the S-Function:
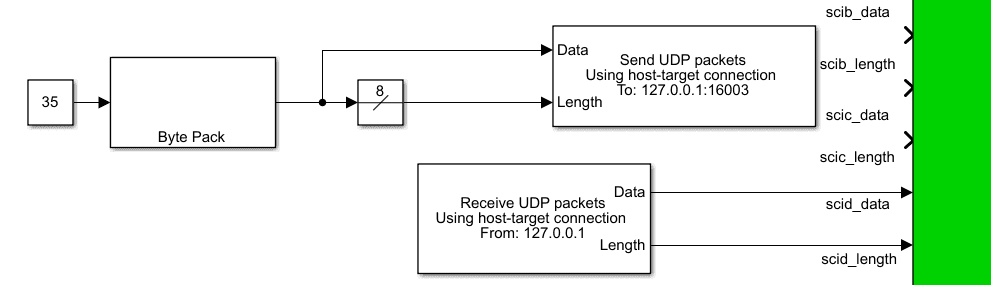
Sending a RS-232 message in Simulink
Finally, the Autopilot 1x configuration should be able to parse this information using Serial Custom Messages consumers. For more information on this, refer to Serial Custom Messages - Input/Output section of the 1x PDI Builder user manual.
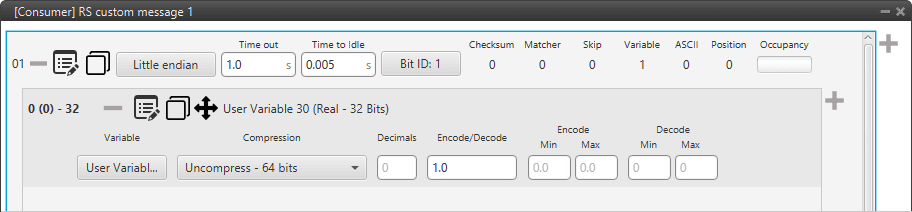
Custom message - 1x PDI Builder
Warning
The variable type parsed by Veronte Autopilot 1x has to match the variable type generated in the Byte Pack block.